On this page:
- Setting up WP AC Connector
- Testing WP AC Connectivity
- Automatic Sync of User Authentication Information
- Single Sign On
Setting up WP AC Connector
Please read these instructions carefully and follow them in order. Things may not work otherwise.
- Make sure both WP and AC can “see” each other – their URLs should be accessible from either sides. So they should either be on a public URL or local setup or must have firewall setup correctly so that requests can go back and forth.
- Upload WP AC Connector module and authentication provider files to activeCollab. Do not forget to upload files in “auth_providers” folder.
- Install the module from activeCollab admin
- Edit “config.php” file in activeCollab. Add
define('AUTH_PROVIDER', 'WPAuthenticationProvider');line after other configuration options. Save the file. - Upload WP AC Connector plugin to WordPress and activate it from WP Plugins page

- Come to activeCollab, go to Profile page of an Administrator user (this user will be creating / updating other user accounts via API. You may also create a new admin user for the purpose)
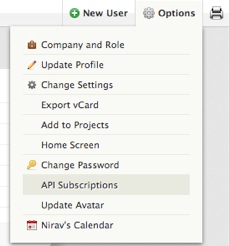
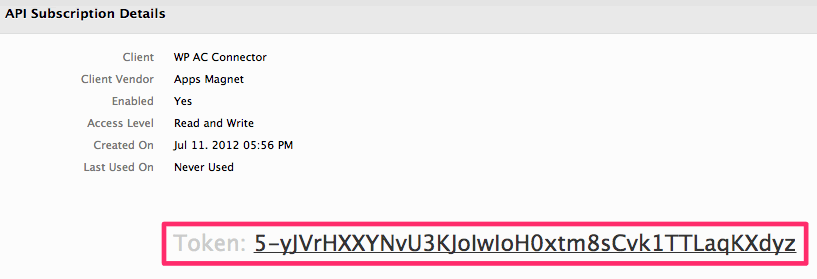
- Create a new API token in activeCollab for this user from API Subscriptions option for this user.
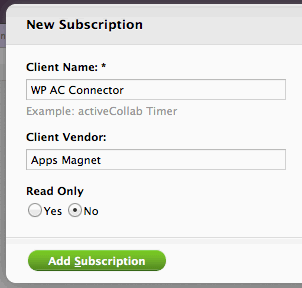
- Click on the magnifying glass icon to view details of the newly created API subscription

- Copy this API token.
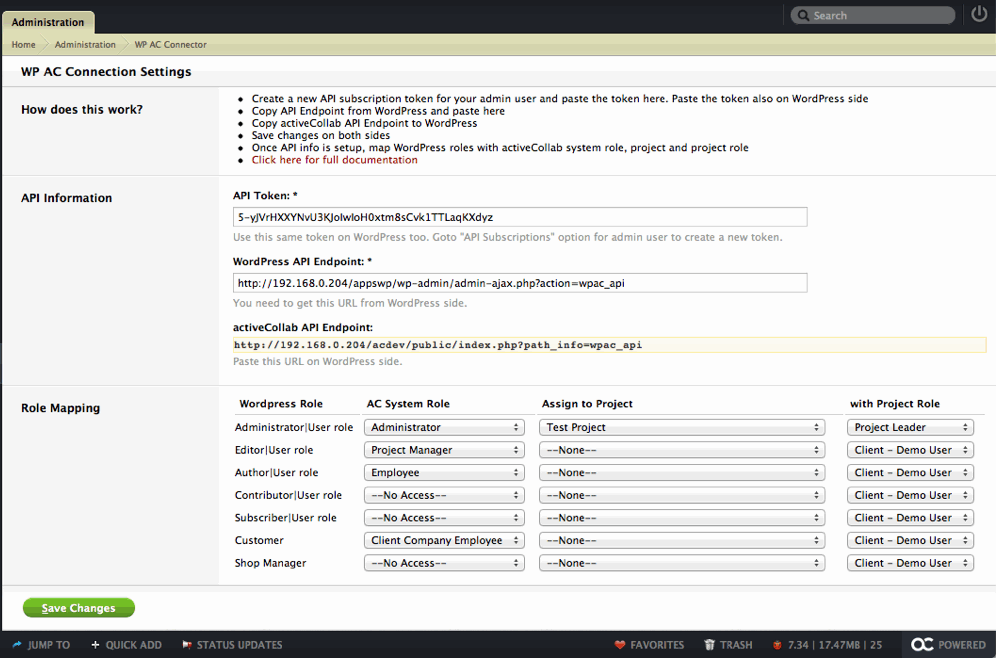
- Go to WP AC Connector administration page within activeCollab.
- Paste the newly created token in Token field.
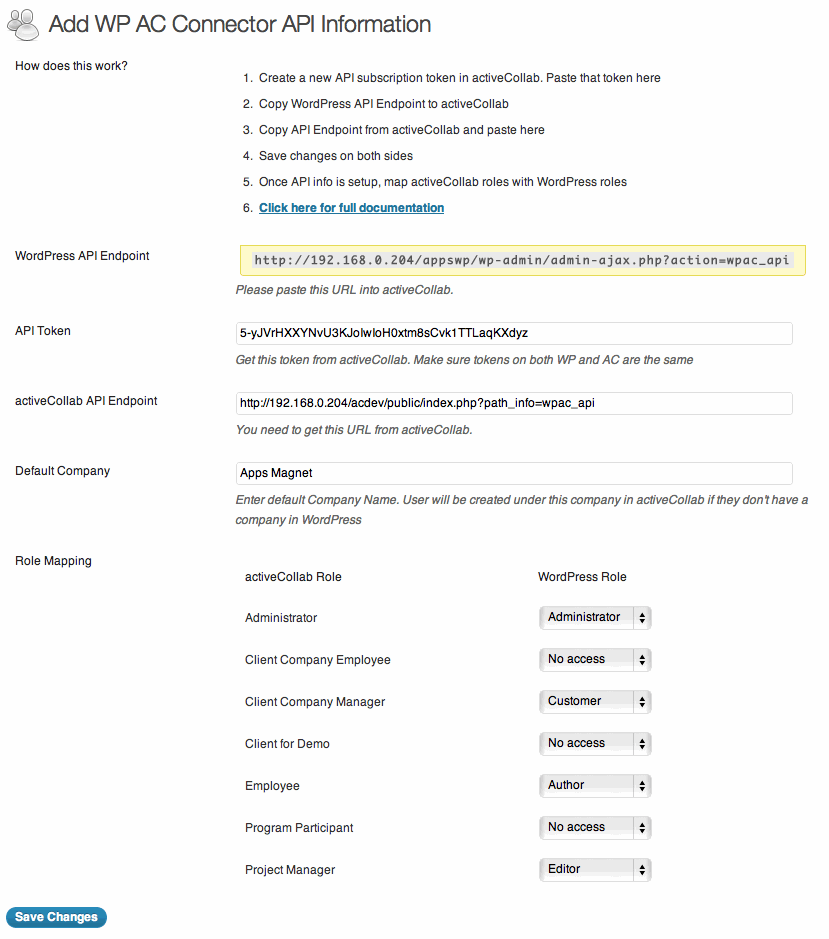
- Go to WordPress admin, WP AC Connector settings.
- Paste the Token copied from activeCollab in Token field.
- Copy the WP AC Connector API URL from WordPress.
- Paste it in activeCollab side settings page for WP AC Connector.
- Save changes in both activeCollab and WordPress.
- Now within activeCollab WP AC Connector settings, map WordPress roles to activeCollab system roles. When new users are created in activeCollab they will get role in activeCollab based on their role in WordPress. You can also select a project and project role to assign to newly created users here.
- Save changes in activeCollab.
- Similarly, map activeCollab roles to WordPress roles in WP AC Connector settings in WordPress. New users created in WordPress will have role assigned based on their role in activeCollab.
- Select a default company for newly created users.
- Save changes.
Testing WP AC Connectivity
- Create a new user in WordPress. Login as that user in WordPress admin. Click on the “Switch to activeCollab” link. This should create a new user in activeCollab and log him in.
- Update a user’s profile in WordPress. His company, email and password should change in activeCollab. Log in as that user in activeCollab to confirm.
- Create a new user in activeCollab. Go to WordPress and login with the same email and password. It should log you in.
- Update user’s profile in activeCollab. Password and company changes should reflect in WordPress.
Automatic Sync of User Authentication Information
WP AC Connector automatically keeps the user’s email address, password and company name in sync across WordPress and activeCollab. Note that other fields (first name, last name etc) are not synchronized yet.
Single Sign On

When a user logs into WordPress, they can automatically login to activeCollab by clicking a link. They don’t need to enter their login / password for activeCollab. This single sign on link is automatically added to the top toolbar once the user logs in to WordPress. You can also use this SSO URL anywhere else on your site.
Note that Single Sign On currently works only from WordPress to activeCollab. We will add activeCollab to WordPress SSO in near future.

